Installing tensorflow 1.13 on Elementary OS Juno.
Setting up Tensorflow with GPU support gave me good deal of pain. Internet is full of tutorials
with older releases of Tensorflow. Some of them use an approach of installing CUDA toolkit via apt.
This approach is not appropriate because of a number of reasons.
Tensorflow 2.0 is in alpha stage now.
It has a planned stable release in second quarter of 2019. Soon enough I'll be upgrading to latest stable.
Nvidia drivers have a penchant for being compatible with specific versions of CUDA toolkit, to make matters
a bit more complicated Tensorflow requires a specific version of Nvidia drivers.
Ubuntu graphics-driver ppa has latest Nvidia drivers nvidia-driver-430 at the time of writing. However, requirements for
Tensorflow 13.1 are nvidia-driver-410 and cuda-toolkit-10.0. cuDNN 7.5.0 is also required for Tensorflow.
Let's begin with a clean install.
Step1: Install Nvidia drivers
If you have nvidia-driver-410 meta package installed, you can skip this step.
Start by adding Ubuntu Graphics Driver PPA if not already added.
sudo add-apt-repository ppa:graphics-drivers/ppa
sudo apt-get update
Remove any nvidia drivers. We are doing a clean install
sudo apt-get purge nvidia*
sudo apt-get autoremove
sudo apt-get autoclean
sudo rm -rf /usr/local/cuda*
If you have a Secure Boot UEFI enabled system it will ask you to set a password which you'll need to enter at the time of reboot. This is a one time only process. Now reboot your system.
Check if install was successful by running following
nvidia-smi
It should print something similar to following.
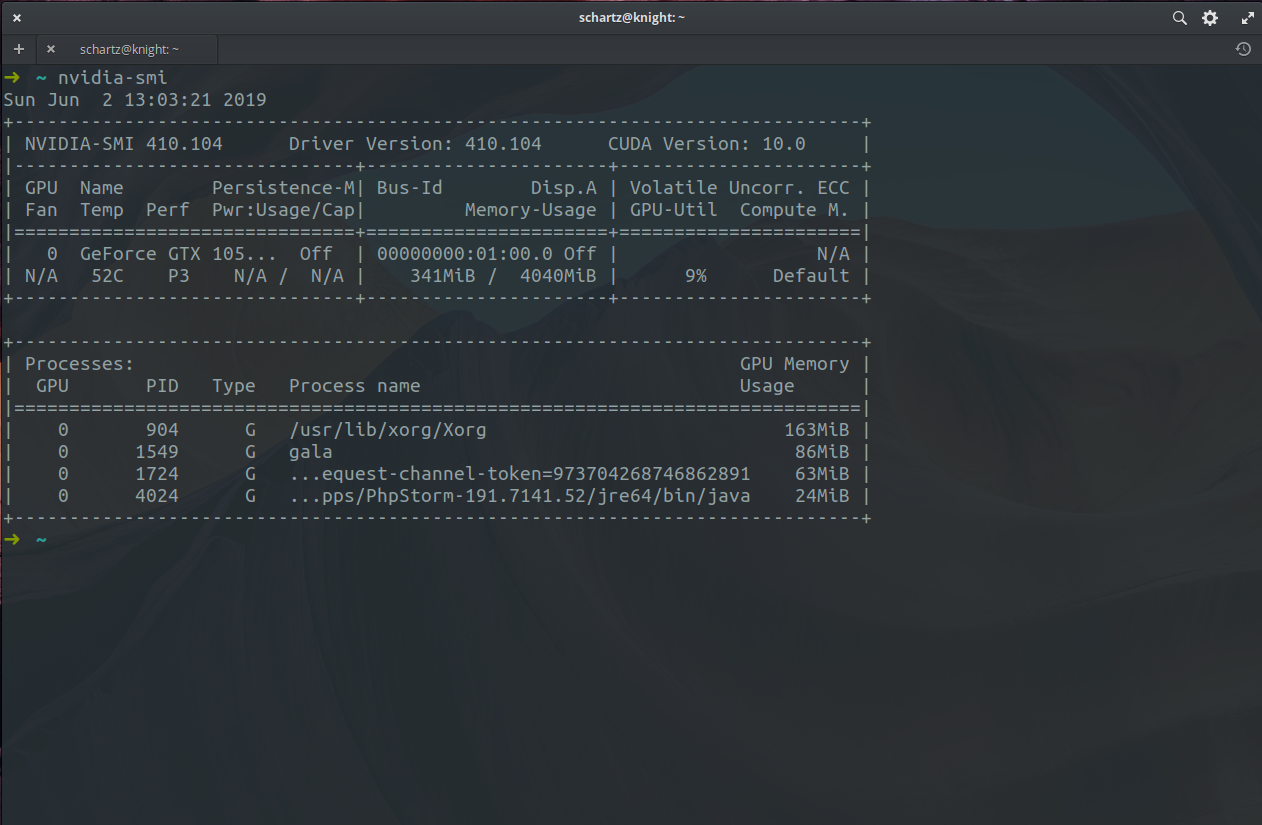
Notice the version of CUDA toolkit stated by the driver.
Version 410 of nvidia driver for Linux is only compatible with CUDA toolkit version 10.
If your screen resolution is messed up after driver install, fix it with following.
sudo nvidia-xconfig
Step2: Install CUDA toolkit 10.0
Install the dependencies
sudo apt-get install g++ freeglut3-dev build-essential libx11-dev libxmu-dev libxi-dev libglu1-mesa libglu1-mesa-dev
Head over to https://developer.nvidia.com/cuda-10.0-download-archive and download the CUDA archive. Make sure to download runfile.
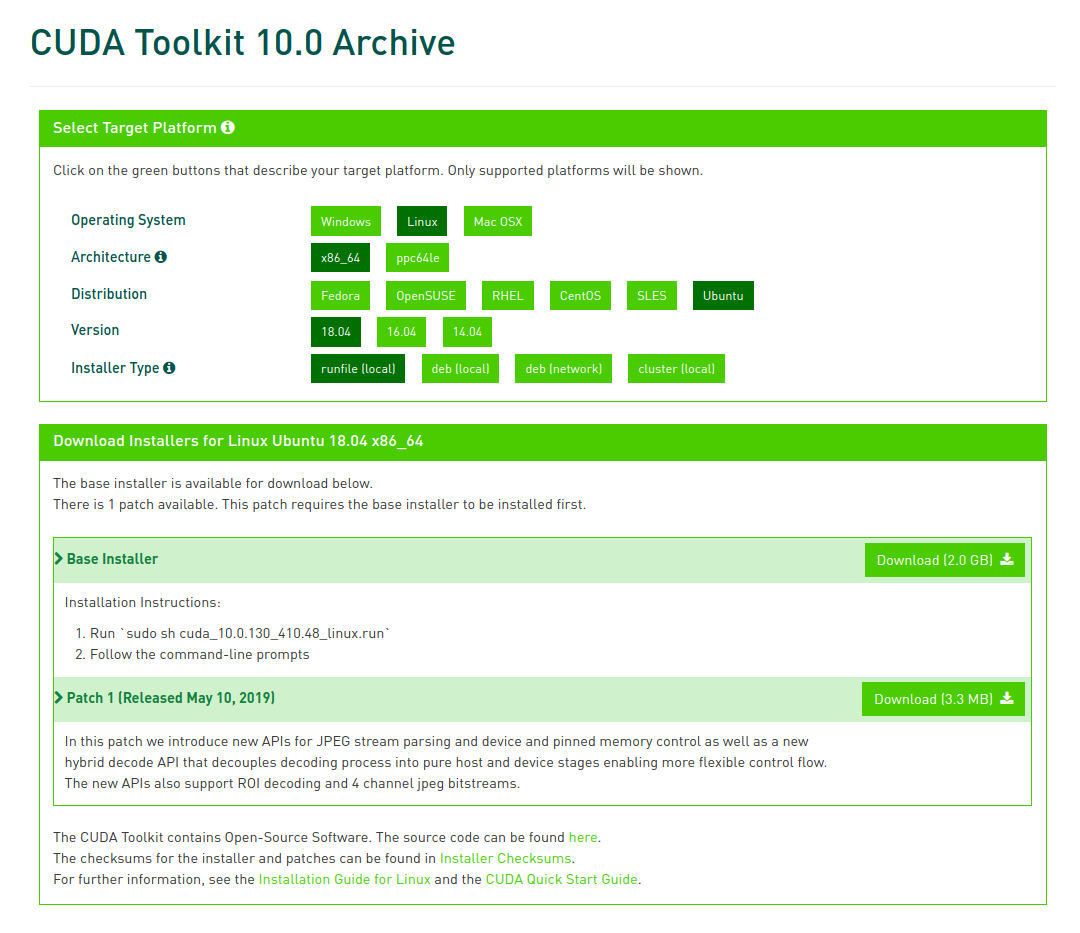
Install it.
sudo sh cuda_10.0.130_410.48_linux.run
In the installation process installer will complain that you are about to install an unsupported configuration.
Answer yes to that. Installer complains about 'unsupported configuration', because it's not the latest version of CUDA toolkit.
However, latest stable version of Tensorflow (1.13 at the time of writing) requires CUDA 10.0 specifically.
Installer will also ask to add a symlink. Answer yes to that as well.
Finally add following to your ~/.bashrc and/or ~/.zshrc in accordance with whichever shell you use.
export PATH=/usr/local/cuda-10.0/bin${PATH:+:${PATH}}
export LD_LIBRARY_PATH=/usr/local/cuda-10.0/lib64${LD_LIBRARY_PATH:+:${LD_LIBRARY_PATH}}
Afterwards load these PATH additions in your current shell session as well as run ldconfig
Run source ~/.zshrc if you are in Z shell.
source ~/.bashrc
sudo ldconfig
Step3: Install cuDNN 7.5.0
Go to https://developer.nvidia.com/rdp/cudnn-archive and click download cuDNN button.
Nvidia will require you to create an account (if you don't already have one). After logging into your Nvidia Developer Account accept the agreement
Click on cuDNN archive which says Download cuDNN v7.5.0 (Feb 21, 2019), for CUDA 10.0 and download cuDNN Library for Linux
Here is the direct download link to the same.
But there is no guarantee that it will work all the time. If the direct doesn't work, follow above steps.
Once you have downloaded the cuDNN archive put it at correct place by running:
tar -xf cudnn-10.0-linux-x64-v7.5.0.56.tgz
sudo cp -R cuda/include/* /usr/local/cuda-10.0/include
sudo cp -R cuda/lib64/* /usr/local/cuda-10.0/lib64
Also install a small dependency
sudo apt-get install libcupti-dev
Add following to your ~/.bashrc or ~/.zshrc
export LD_LIBRARY_PATH=/usr/local/cuda/extras/CUPTI/lib64:$LD_LIBRARY_PATH
And finally
source ~/.bashrc
sudo ldconfig
Step4: Test it
It's recommended that you have a virtual environment for this.
I prefer virtualenvwrapper.
You can use any tool to create virtual env.
mkvirtualenv tfgpu
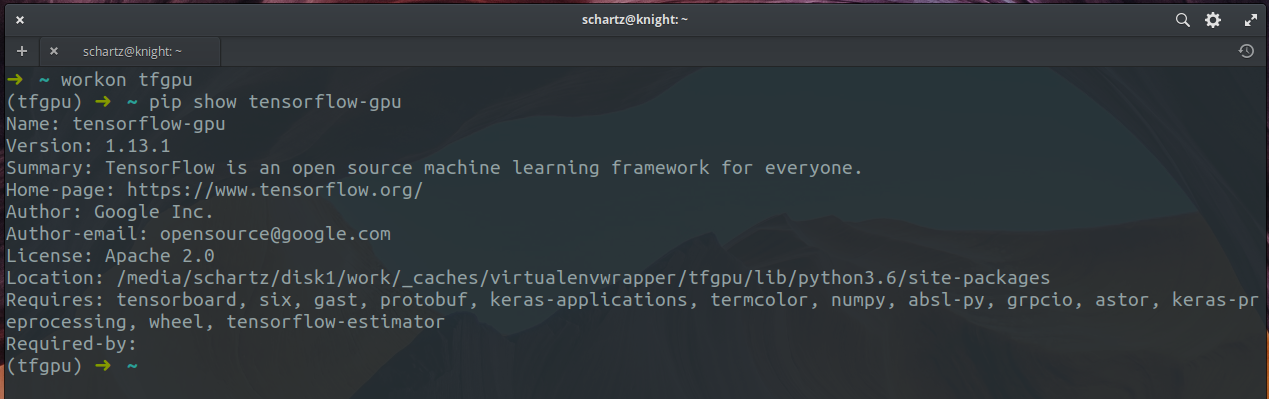
workon tfgpu
pip install tensorflow-gpu==1.13.1
pip show tensorflow-gpu
It should show something like this
Now go build some AI